How to Create a New Approval
This guide will provide step-by-step instructions on how to perform an artwork approval in LinkFlow Systems.
Instructions
1. Accessing the System
- Access the system through the link app.linkflow.com.br
- Log in with your credentials: email and password.
2. Accessing the Approval Module
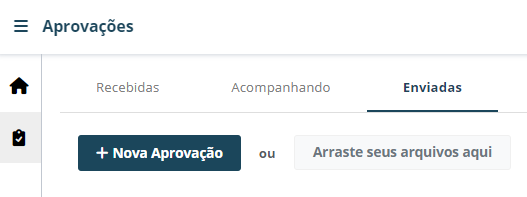
- Acesse o menu lateral esquerdo e clique na opção Aprovações

3. Creating a New Approval
- Click on the Sent tab and then click on New Approval.
-
Attach the artwork file.
-
Specify the client you want to send the artwork to and fill in the item description.
-
Indicate the desired type of approval:
All: The approval of all approvers is required; if anyone rejects it, the project cannot be approved.
Group: If one of the approvers rejects it, the project's status will be changed immediately.
One Only: The project's status will change as soon as the first approver gives their feedback.
Anonymous: OThe project's status will change with the feedback of the first approver, but there will be no record of who made the approval.
- Add the approvers and followers of the approval, and click Send.
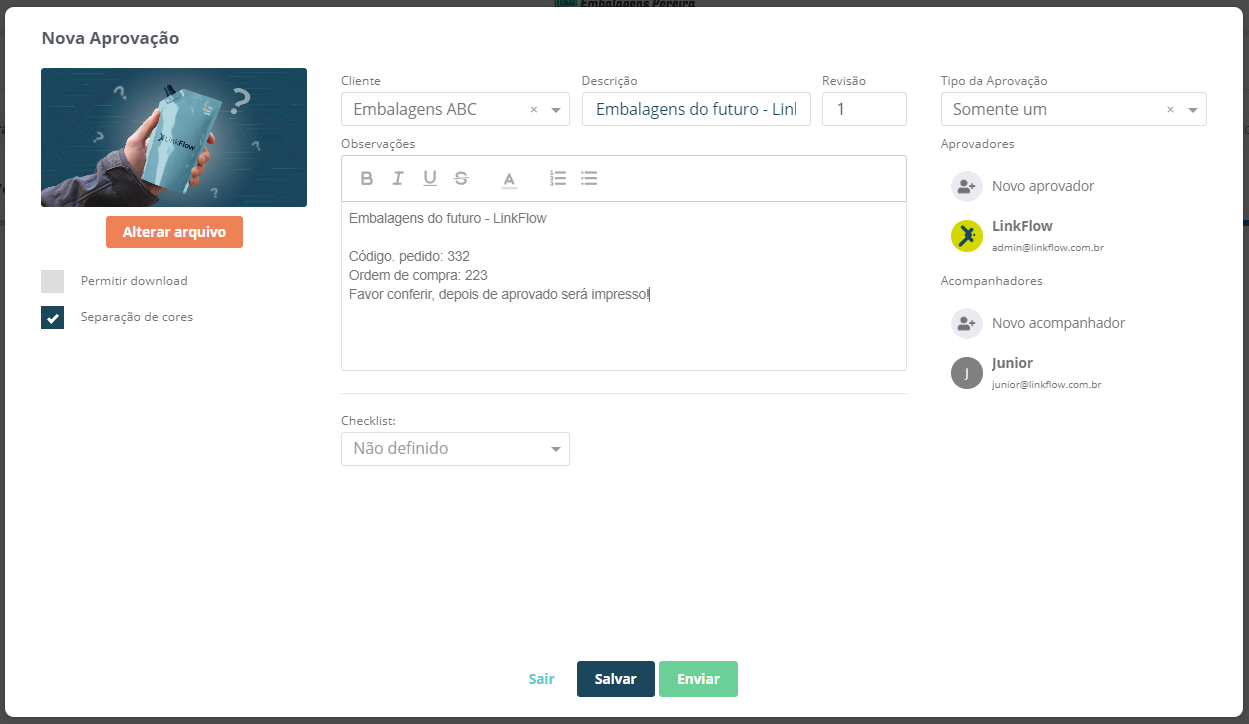
- You can also select options to allow download of the file and to view the color separation feature within the integrated viewer.
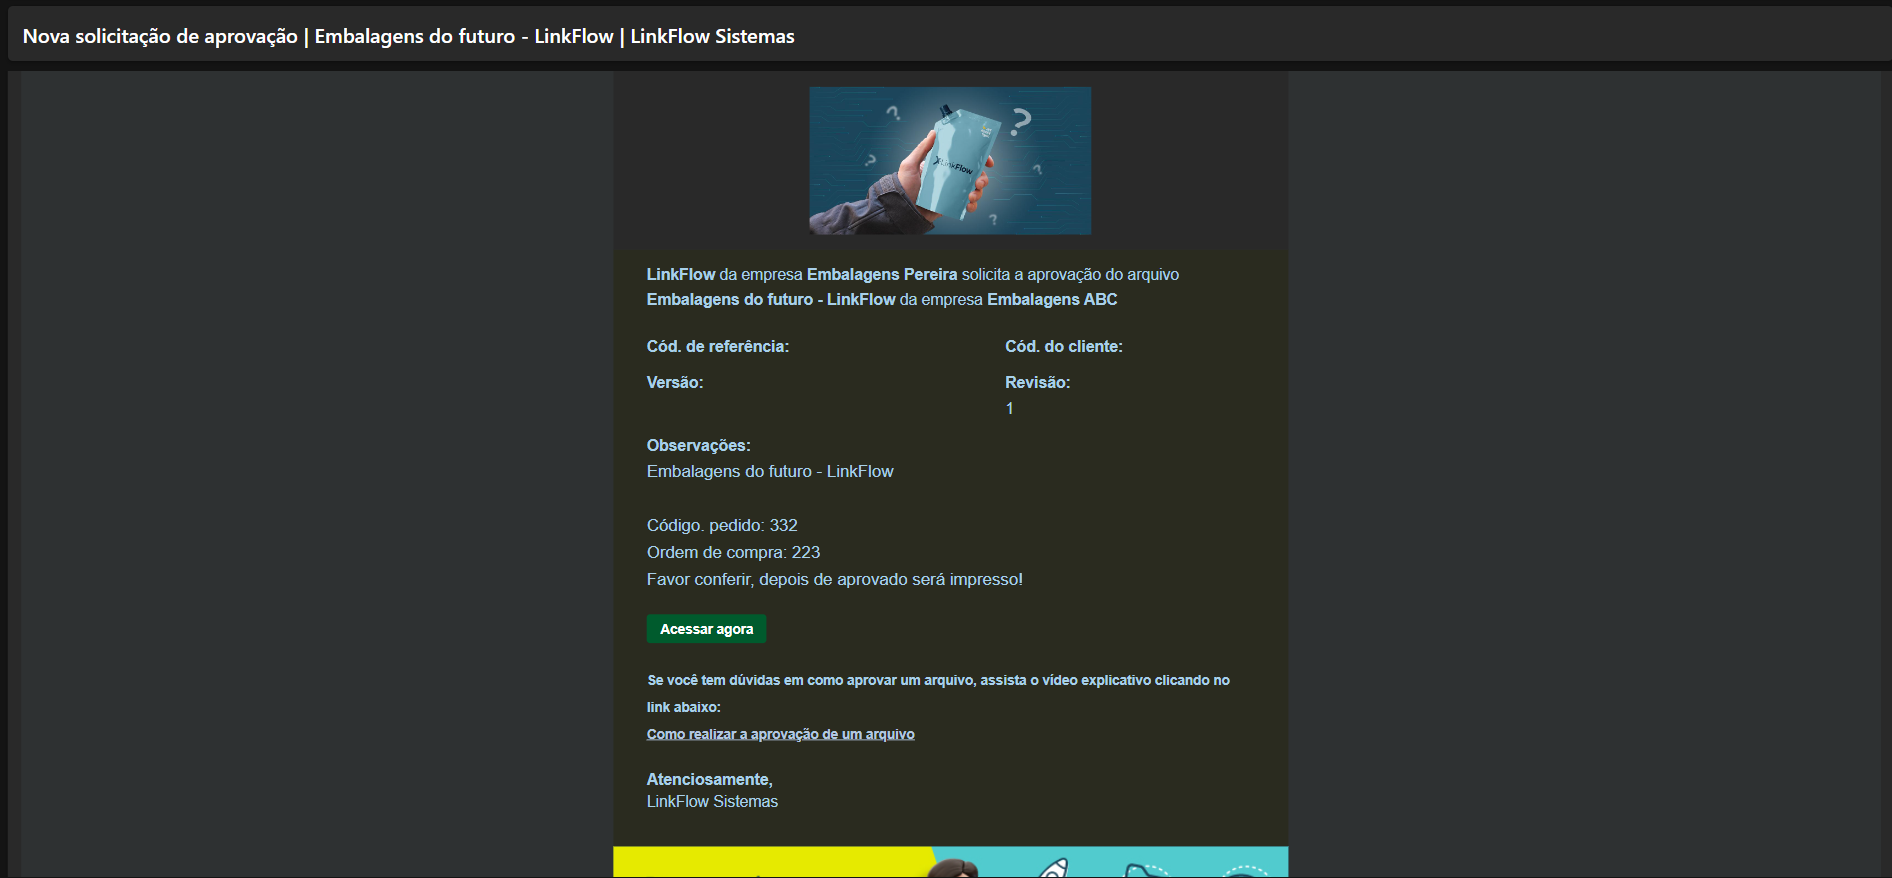
4. Notification
- After sending, the system will automatically notify the involved parties via email.
Congratulations! You now know how to create a new approval in LinkFlow by following these simple steps.